Tuesday, March 27, 2012

NEWFOUNDLAND: DIESEL 14 WEEKS

Diesel had his first bath from the hose and blow dry. He did really well for a pup. But not 5 minutes later his head and feet were wet again. There is NO way to keep a Newfoundland out of the water bowl. Good think I have a refilling water bowl that is hooked up to the faucet outside. So the other animals don't get thirsty when he drinks and plays with all the water.
We love our Newfy:)


 Can't you tell I'm thirsty? It's been like 2 minutes from my last drink and it is a HOT 70 degrees outside.


Friday, March 23, 2012

Sloppy Cupcakes

The Original Name was Jumbo Burger Cups
BUT as I patiently waited for the Husbands first bite of a new recipe I held my breath.
Then the all important question: How is it? A pause.......then he said the worst thing ever. You know what this taste like? NO WHAT?!! Thinking he was going to say Dog Food.
He said Sloppy Joes. So I took a bite and IT DID! It did NOT taste like a hamburger. So I renamed it, Sloppy Cupcakes and they were good:)

1 lb of ground beef
1/2 cup of ketchup
1/3 cup dill pickle relish
2 tbs yellow mustard
4 oz of cream cheese (1/2 of the 8 oz package)
1 tsp Onion Powder
1/2 tsp salt
1/2 tsp pepper
1 Can of Big refrigerated biscuits (8 count)
1 Egg
1 tsp water
2 tablespoons of sesame seeds

Heat Oven 350
Cook Beef in skillet and drain
Stir in ketchup, relish, mustard, cream cheese, onion powder, salt and pepper
Cook for about 5 minutes, stir occasionally until it is nice and creamy

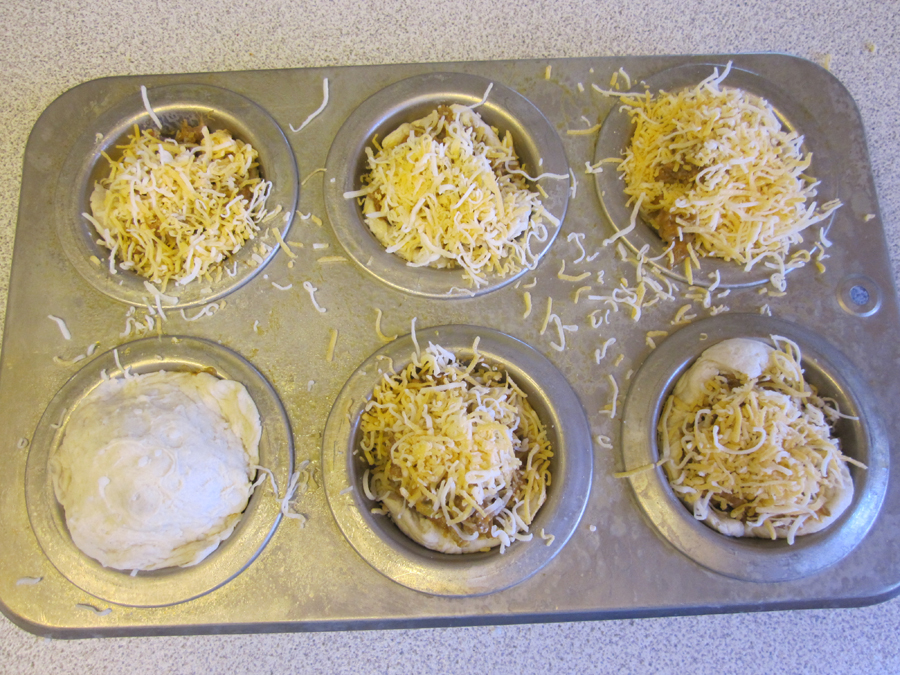
Spray your Cupcake Pan
Separate dough into 8 biscuits and cute them in half horizontally
Press 1/2 biscuit in each cupcake
fill your cupcake with Meat
Top with 1/2 biscuit and press the sides together to seal

In a small bowl beat 1 egg and water together. Brush egg on each cupcake top and sprinkle with VERY expensive Sesame Seeds. (Seriously 1 little bottle was $5!)

Bake in over 15-20 minutes, until tops are golden brown


Thursday, March 22, 2012

Saving for Christmas

I know what you're thinking.....
What!!! Christmas in March?
But yes, I should have started in January, but I didn't think of it.
So here is my plan:
Get a Clear Container
Every Paycheck pull out $10, $20, $40 or more from the ATM or get Money Back from a store.
There is 17 paychecks, give or take until November 1, when we all start stressing about Christmas Funds.
Here is the good part
If you save $10 a paycheck by November 1 you will have $170. I know that doesn't sound like much but if that is all you can pull out then come November you will be that much ahead.
If you save $20 a paycheck by November 1 you will have $340, now that is looking better.
I am going to go for the $40 a paycheck and by November 1 I will have $680! And will 4 kids that will help a bunch (maybe my whole Christmas).

The trick is you HAVE to do it ON Payday. Take it CASH and put it where you can SEE it to remind you. I tried to find my pretty Christmas cup but it is buried in Storage. If you have one, even better it will help you remember WHAT you are saving for. I know it is hard but if I save in the Bank I have a HARD time taking it out or NOT using it for something else like car tires (boring).

Please share your creative Jars and where you are keeping it to remind you. Mine is on my nightstand.
If you don't mind tell us how much you are trying to save. And you know when you get that extra paycheck now and again, sneak some extra money for you Christmas Jar. Your family will thank you:)

 I know my jar is boring it was all I could find, but I will keep looking.
I know I only have $15 but that is cause payday is tomorrow and the $15 is what I got for selling some baby stuff. Every little bit help.

Cupcake Chicken Pot Pie

Ingredients:
8 oz of cooked chicken, diced up ( I cheat and buy precooked chicken)
1 can of cream of chicken soup
1 cup of your favorite frozen vegetable
1 cup or more of shredded cheese
1 tsp onion powder
1 tsp garlic salt
2 (10oz) cans of  biscuits
        *first time I used cheap small biscuits, they were a little small. Bigger biscuits would work better

Preheat oven 400
mix cook chicken, soup, frozen veggies, cheese and spices in large bowl
grease your muffin pan
place one biscuit in each muffin cup and spread up the sides
Spoon Chicken Mix in each cup
On a few of my muffins I added additional biscuits to the top and they worked great.
CHEESE the top:)

*Cooking With Kids*
Instead of mixing the frozen vegetables all together, Set aside another bowl, Have Kiddo's wash their hands. Dump the Frozen Vegetables in a big bowl. Have the kids pick out which vegetables they want in their cupcake. You can set rules, like you have to have 2 different Vegetables and a total of 7 or whatever. My little guy Loves peas so he loaded up his cupcake with peas. Me I am not a fan of green beans, so I picked out the green beans. This is great especially with kids who hate veggies (like my kids) Also anyone with sensory kids like me, the frozen veggies don't smell and are not squishy just cold. With all my years in OT therapy with my sensory kids, I've learned the more kids have control of their food, the more likely they will eat. After they have their veggies picked out have them (with clean hands) squish the veggies into their cupcake (good sensory play). Then put the toppings on, cheese or another biscuit.
After I cooked with the cheap small biscuits I thought oh you know what would have been fun? Take another roll of biscuits for the kids. Roll them out a bit and have the kids make shapes with cookie cutters or write their initials on their cupcakes so they know which one is theirs. I wish I would have done this last night, oh well next time and I will take pictures. Happy Cooking, Tamy


Lego Travel Box

Wood Box with lid: Hobby Lobby $4
Spray Paint
Sand Paper
Lego Plate
Glue and Clamps
1: Sand
2: Spray/Dry/Spray/Dry/Spray/Dry (understand?)
3: Cut Lego Plate to size of lid, scissors worked great
4: Gorilla Glue the Lego Plate to wood lid and clamp
Let dry over night.
If using Gorilla Glue don't get to close to the edges, it expands when dry
 5: I had some left over felt, so I cut a piece and spray glued it to the bottom to help with the sound
Now if I was brave I would paint "Lego" on the side but I would TOTALLY mess that up.
But Vinyl would look cute

Since Hobby Lobby only had ONE box, my kids are now bugging and fighting me who gets the first box.


Wednesday, March 21, 2012

Easy Lasagna Cupcakes

*Warning I am NOT a cook* In fact I HATE cooking. So if it is easy and yummy I will make it.

Wonton Wrappers
Spaghetti Sauce
3/4 pound of  Browned Hamburger
Parmesan cheese
Ricotta Cheese
Shredded Mozzarella Cheese
Pre Heat Oven 375
Grease cupcake pan (I used both mini and normal both worked great)
Press one Wonton wrapper on the bottom of each cupcake
Sprinkle Parmesan cheese
Glob/Plop some Ricotta Cheese
Sprinkle Mozzarella Cheese
Plop/glob Hamburger (cooked)
Plop/Glob spaghetti sauce
Press another wonton wrapper on top
Repeat Layer
I ended it with Lots of Cheesy Goodness on top (Mozzarella)
Bake In Oven for 20 minutes
Let cool for a few minutes and enjoy


I forgot to take a picture of my end product, but it was YUMMY

Easy Taco Cupcakes

*Warning* I am NOT a cook! I only cook SIMPLE and EASY. Don't make this harder than it is*
Oil
1/2 pound of ground beef (chicken)
1 packet of taco Seasoning
16 Wonton Wrappers (found in the produce section next to tofu)
queso, salsa con queso or any cheese sauce
Salsa
Shredded Cheese (any flavor will do)

Optional: Black Beans, Sour Cream and Guacamole

Brown Hamburger and mix in Taco Seasoning

Spray your cupcake pans with cooking spray
press one wonton wrapper in each cup
put a dab, glob or whatever you call it of your Cheese/queso dip on the bottom
Spoon your Meat/Bean mixture
Glob of salsa
Sprinkle Cheese
Press another Wonton wrapper on Top
And REPEAT

Bake 375 for 18-20 minutes
Serve with all your Taco Goodies


First layer
 Ready to hang out in my fridge until dinner time (I made it in the morning and then forgot about it)
 Golden, Cheesy Delicious

Blow Dryer and Flat Iron

I don't know about you, but I have wondered what to do with my blow dryer and flat iron. I mean they get used 2-3 times a day and I have very little room/storage in my bathroom. I went searching and shopping with my husband in tow (since he had to agree to put it up for me).
After a few stores and a lot of NO's from my shopping companion. We found the perfect thing to hang them both on the wall at IKEA.
It cost us $12.99 and works PERFECT!

Before............

What it was meant to be used for.....soap dish and cup


Perfect for the blow dryer and flat iron.
I know alot of people like clean bathrooms, but my blow dryer and flat iron NEVER got put away. So now they are out of the way but always acceable.
What do you think???

Bathroom Cabinet Bow Storage

Magazine Holders have so many uses!
I bought plastic ($8), Cardboard ($1) and Wire/metal ($2). My husband agreed to hang them for me in the kids bathroom. He picked the plastic, not to heavy but strong.
I love them! They work great for the millions of hair bows.


Newfoundland Puppy

This Blog is for Tammy, you can pin my pictures of Newfoundlands on Pinterest! You have my permission.

Diesel 3 months old


Diesel February 2012: 2 months old


First Blog

With all the Copy Right Concerns on Pinterest I decided to make my own blog that people can pin from so they don't get into trouble. So when I do a craft or cook a semi decent meal I will blog it and you can Pin it.....With NO Worries:) Sound good?